
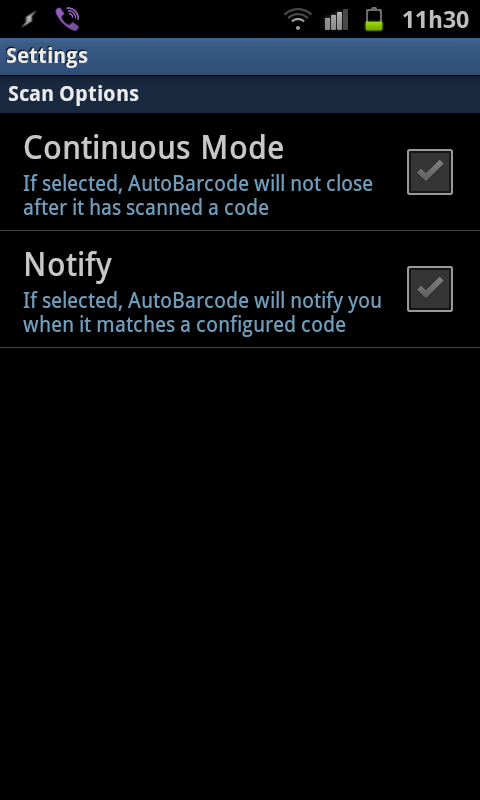
Main Settings
-
Continuous Mode:If you turn continuous mode ON, AutoBarcode will not exit until you press the back button. Use this if you normally scan more than one Barcode at a time. Otherwise, leave it OFF.
-
Notify:Use this to be notified everytime AutoBarcode matches one of your configured Barcodes. It will not notify you if the scanned barcode does not match any barcode you have configured in Tasker. The notification will show a popup on your screen if you’re using continuous mode, and will show up on your Notification Menu otherwise.
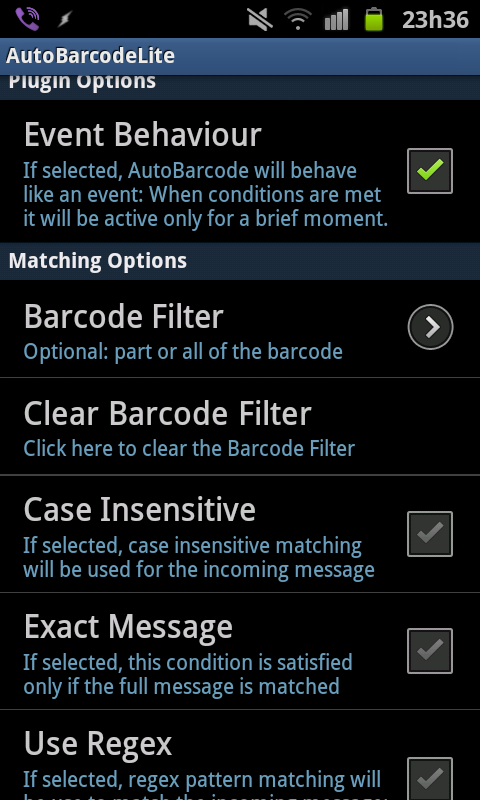
Individual Barcode Setup (Options and Matching Options)
-
Event Behaviour:Here you can choose how this barcode behaves: if you want the use a barcode to let Tasker know that you have arrived someplace, like work, home, etc, uncheck this option. This way, your Tasker profile will remain active until you scan some other code. If you want to simply show a popup, play a song or do anything else that only occurs at that moment in time, check this option and your profile will become active and inactive right away.
-
Barcode Filter:Here you can define what barcodes will be considered a match for this Tasker profile. For instance, if you simply want to match a barcode that says “Hi!”, you could write “Hi!” in this field. You can also partially match the barcode (“Hi” will also match “Hi!”) unless you check the option below to match the exact message.
-
Clear Barcode Filter:This will simply clear the barcode filter. Leave it cleared to match any barcode you read (could be useful for testing purposes)
-
Case Insensitive:Use this option if you don’t want the Barcode Filter to match the exact case if your Barcode. If you check this, a “hi!” Barcode Filter will also match a “Hi!” Barcode.
-
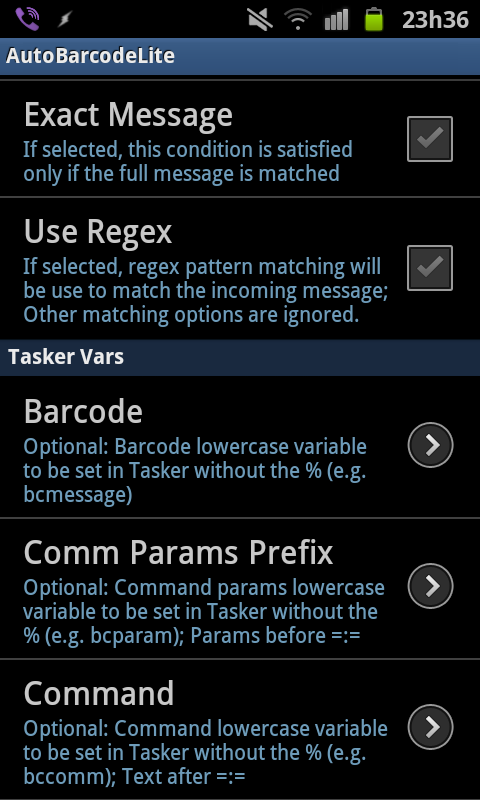
Exact Message:Use this option to only match the exact message or the exact message with a different character case if you check the Case Insensitive option. For example, if you check this option, a “hello sir” barcode filter will only match a “hello sir” barcode and not a “hello sir, nice to meet you” barcode. If you check the Case Insentive Option, it will also match a “hElLo SiR” Barcode or any other casing variant, but not a “HellO SiR!” Barcode, for instance
-
Use Regex:Select this so your Barcode Filter will behave like a Regular Expression. Regular Expressions are advanced ways that you can use to describe a group of characters, words or phrases. These are useful for creating commands in AutoBarcode.Some quick regular expression examples:
.*:matches any character 0 or more times.Example use:”C.*ar” will match anything that starts with “C” and ends with “ar”
.+:matches any character 1 or more times.Example use:”C.+ar” will match anything that starts with “C” and ends with “ar” as long as there is one more characters in between (like “Caar” or “Caaaar”)
[abc]:matches a or b or c”[abc]+” will match anything that has one or more a, b or cs (like “a”, “acb”, “abc”, “abcabacbbb”)
[1-9]:matches every number between 1 and 9″number [1-9]” will match anything that starts with “number ” and ends with a digit between 1 and 9 (like “number 4” or “number 7”)
Find out more about Regular Expressions here.
Individual Barcode Setup (Tasker Vars)
-
Barcode:Here you can set variables to use in Tasker in the Entry Task that will run in this Tasker Profile. For example, if you enter “barcode” here, your entry Task will have access to a variable named “%barcode” that you can use for whatever you like. This will contain the full barcode that was read.
-
Comm Params Prefix:Here you can define how command parameters will be named. For example, if you write “param” here, your entry Task will have access to variables named “%param1”, “%param2” “%param3”, etc, depending on how many parameters your Barcode has.
-
Command:Here you can define how your command text variable will be named. For example, if you enter “command” here, your entry Task will have access to a variable named “%command” that you can use for whatever you like. This will only contain the command text (right side of =:=) and nothing else.